
Create your own Blogger Template from scratch
Building my own Blogger template was one of those goals that I wanted to achieve anyhow. Alhamdulillah, previous year I started my own template publishing site where I have uploaded more than 10 templates till now. But now today when I look back I can remember that there were not so many resources which helped me to build my first ever, unique template and still there are not enough resources available on internet.

I got many emails and requests via comments by users to publish a complete and comprehensive post about developing Blogger templates.
I also saw many people on different blogs, Facebook, Twitter and forums who were asking for a comprehensive post or resource which can help them to understand the basics of building a Blogger template.
Unfortunately, As I said there are not many resources which can help them out. And many which were available on internet are deprecated and useless. And many authors have deleted many useful resources,(I really don’t know why).
So yesterday after seeing all this I decided to publish a post on my blog which will help new developers to understand the basics of blogger template development and to help them to build their first and unique Blogger template.
Also Read: Free Blogger Templates in 2016
You can consider this post a small course about Blogger template development. But before moving any further make sure that you have the required skills to create your first template:
- HTML
- CSS
- Javascript/jQuery(Optional to build a interactive webpage)
Now if you know all of these languages, then we are ready to go.
What is a Template?
Before moving any further, first let us define that what is a template? A template is a combination of different sets of elements to build a design of a system. But when it comes to building a web template, then it means are still very similar.
A basic web template consists of a header,content area, sidebar and footer.

Make sure that you remember these things. But wait, there is still on another thing behind the scenes which is very important and that is the <head> section of your website which is not displayed to the user but it is very important.
So first we will discuss about the importance of a template’s <head> section and how to build it?
Creating Blogger Template Head section
As I told you before the <head> section is the most important one. If you are familiar with HTML, then you must already know it. Inside <head></head> tags you store all the necessary information about your website.
For example: meta description, your site’s title, stylesheets’ links, Javascript links and viewport details(We will talk about it later).
You can also store all of your CSS code inside head tags. And you have to do it in blogger. Now let’s start being more practical.
Go to Blogger.com and click on New Blog button. Now put a title and put an address for your blog (i.e. example.blogspot.com) and click on create Blog button.

Now you will be automatically redirected to your new blog. Before doing any thing further, put some articles on your newly created blog.(at-least 10 articles). Make sure that every article has one image.
Or if you do not wish to put so much effort on publishing articles on your newly created blog, then just download this file. And import it to your blog by moving on to your Blogger Dashboard-> Settings -> Other and finally click on Import blog button as shown below:

After clicking on Import Blog button a new pop-up will appear where you will find a choose a file button. Click on it, upload the file which you have just downloaded, check I am not a robot button and click on Import Blog button.
Now go to your blog’s template section, click on Edit Html and delete every single line of code which is inside the code pane.

Now you have deleted your previous template and it is time to create your own one. For that copy the code which is given below and copy it to the your Blogger template editor as shown in the next image.
[html]
<?xml version="1.0" encoding="UTF-8" ?>
<!DOCTYPE html>
<html xmlns=’http://www.w3.org/1999/xhtml’ xmlns:b=’http://www.google.com/2005/gml/b’ xmlns:data=’http://www.google.com/2005/gml/data’ xmlns:expr=’http://www.google.com/2005/gml/expr’>
<head>
<b:include data=’blog’ name=’all-head-content’/>
<title>
<b:if cond=’data:blog.pageType == "index"’>
<data:blog.pageTitle/>
<b:else/>
<b:if cond=’data:blog.pageType != "error_page"’>
<data:blog.pageName/> | <data:blog.title/>
<b:else/>
Page Not Found | <data:blog.title/>
</b:if>
</b:if>
</title>
<b:skin><![CDATA[ body#layout #widgetID { The Properties For Widget In Layout Page Goes Here } body { background:white; color:black; } ]]></b:skin>
</head>
[/html]

Let’s have a brief description of what we have done right now. First we added a line “<?xml version=”1.0″ encoding=”UTF-8″ ?>”. It tells the browser that we are using XML document.
Secondly, we added “<!DOCTYPE html>” to tell the browser that we are also using HTML5 in this document.
After <head> tag we inserted necessary code including the code which is inside title tags to tell the browser about the site’s title.
Inside <b:skin> tags we will put our CSS stylesheet to design our template elements. We will talk about it about later.
Now your template’s head area is set and it’s time to move further. But do not try to save your template now. Because your template cannot be saved now since it is incomplete.
Developing Blogger template Header section
Now when we have created the head of our Blogger template, it is time to start building the body of your template. For that we need to first create the header of our template. Remember, there is a huge difference between head and header areas.
Inside head area you put information about your site such as site title etc and inside header section you can put your site’s logo or menu.
To build a simple header area of our Blogger Template, we will add the below given code in this existing code :
[html]
<body>
<header>
<b:section class=’header’ id=’header’ maxwidgets=’1′ showaddelement=’no’>
<b:widget id=’Header1′ locked=’true’ title=” type=’Header’></b:widget>
</b:section>
</header>
[/html]
As I said before now we are developing our template’s body which consists of 4 major elements(header, content area, sidebar and footer). So we started with the html <body> tag after which we added the <header> section.
Just copy the code exactly how it is and paste it into the already existing code as shown below :

Building Content Area of our Blogger Template
Now when we have created <head> area and header section within body tag, it is time to start developing the most important part of our template which is the content area.
To build it just copy the below given code and paste it into the already existing code as shown in the next image:
[html]
<article>
<b:section class=’main’ id=’main’ preferred=’yes’ showaddelement=’no’>
<b:widget id=’Blog1′ locked=’true’ title=’Blog Posts’ type=’Blog’>
</b:widget>
</b:section>
</article>
[/html]

Now to this point, you should have this code in your template’s code pane :
[html]
xmlns:b=’http://www.google.com/2005/gml/b’ xmlns:data=’http://www.google.com/2005/gml/data’ xmlns:expr=’http://www.google.com/2005/gml/expr’>
<head>
<b:include data=’blog’ name=’all-head-content’/>
<title>
<b:if cond=’data:blog.pageType == "index"’>
<data:blog.pageTitle/>
<b:else/>
<b:if cond=’data:blog.pageType != "error_page"’>
<data:blog.pageName/> | <data:blog.title/>
<b:else/>
Page Not Found | <data:blog.title/>
</b:if>
</b:if>
</title>
<b:skin><![CDATA[ body#layout #widgetID { The Properties For Widget In Layout Page Goes Here } body { background:white; color:black; } ]]></b:skin>
</head>
<body>
<header>
<b:section class=’header’ id=’header’ maxwidgets=’1′ showaddelement=’no’>
<b:widget id=’Header1′ locked=’true’ title=” type=’Header’></b:widget>
</b:section>
</header>
<article>
<b:section class=’main’ id=’main’ preferred=’yes’ showaddelement=’no’>
<b:widget id=’Blog1′ locked=’true’ title=’Blog Posts’ type=’Blog’>
</b:widget>
</b:section>
</article>
[/html]
Building your template’s sidebar
We have managed to create the two most important areas of our Blogger template and these are Header section and content area. Now we need to build a sidebar for which we will copy the below given code and will paste it underneath the existing code as shown below:
[html]
<aside>
<b:section class=’sidebar’ id=’sidebar’ maxwidgets=” showaddelement=’yes’>
</b:section>
</aside>
[/html]

Now we have also added a sidebar and you can add as many as you like by adding the same code again and again.
Building our template’s footer
Now when the core of our template is built and we have to only add the footer, things are very easy for us. Now if you want to add a simple footer in your template with a copyrights description, then just copy the code which is given below and paste it after all the existing code as shown in the next image :
[html]
<footer>
<div class="copyrights" style="clear: both;">
Copyrights © 2015 Your blogger template
</div>
</footer>
</body>
</html>
[/html]

This is a simple footer, you can also add a much more advanced footer with widgets. If you really want to add a footer with widgets, then read this article.
Now save your template and click on view blog button. You must see a very similar web page to this :

Designing your Blogger Template
Now we will start designing our template that we have just created. For that we search for <b:skin> tag in which all of our CSS styling will be saved.
Firstly, we will set our template’s body margin and padding to 0. For that copy the below given CSS code and paste it before ]]></b:skin> tag as shown in the next image :
[css]
body {
padding: 0px;
margin: 0px;
}
[/css]

Now let’s start designing the header of our template, for that copy the CSS stylesheet which is given below and paste in just before ]]></b:skin> tag :
[css]
header h1 {
margin: 0px;
}
header {
padding: 10px 0px;
border-bottom: 2px solid #262424;
font-family: sans-serif;
background: #F2B25C;
color: white;
text-shadow: 2px 2px 2px black;
}
[/css]

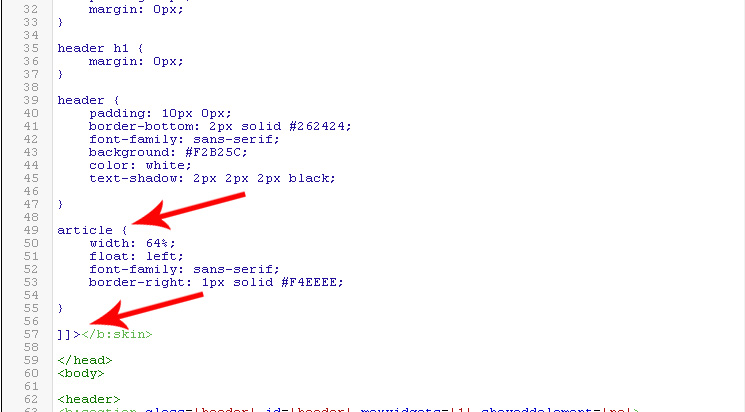
Now let’s design our Blogger template’s article section where all the content will appear. For that just copy the below given CSS code and paste it again just after the before the ]]></b:skin> tag.
[css]
article {
width: 64%;
float: left;
font-family: sans-serif;
border-right: 1px solid #F4EEEE;
}
[/css]
It’s time to design our template’s sidebar now, but before that we need some widgets in the sidebar. For that, go to Layout section and add some widgets. I will like you to add a Popular Post widget and few other widgets too as well. Especially, search widget and follow by Email widget.
After that go back to the Edit HTML area and just before ]]></b:skin> tag paste the below given code as shown in the image:
[css]
aside {
float: left;
width: 35%;
}
aside h2 {
background: #262424;
font-family: sans-serif;
border-bottom: 2px solid #F2B25C;
color: white;
padding: 2px;
}
[/css]

Finally, we will design our blogger template’s footer. For that copy the below given code and paste it just before ]]></b:skin> tag.
[css]
footer {
float: left;
width: 100%;
background: #262424;
border-top: 1px solid black;
color: #F2B25C;
}
[/css]

The Result
We have done some styling of our template. We first designed our template’s header and then content area, sidebar and finally footer.
After doing all that, our Blogger Template should look like this:

Of-course, our template does not look spectacular but at-least we have managed to create a simple template which can be turned into a much more advanced template by doing some useful modifications and additions such as putting up a new menu and by customizing widgets.
You can do as many alterations as you want, but now you know how to build a simple template. So design your first template, and share it with us in comments.
Final Words
Make sure that you make your template SEO friendly and faster for better search engine ranking results. If you have made a piece gem, then share it with us and we will be glad to share your template on our Blogger Template publishing site.
Whenever you are building a Blogger template, make sure that you make a mobile friendly template. For that always add following <meta> viewport element just before </head> tag:
[html]
<meta name="viewport" content="width=device-width, initial-scale=1.0">
[/html]
After that test whether it is mobile friendly or not on Google Mobile friendly test tool. To know how to build a mobile-friendly web page read this article.
Also ensure that your template’s speed is enough to to fulfill modern search engine requirements. For that test your Blogger template’s speed at Pagespeed insights tool.
Related Posts


About The Author
Hasnain Haider Abbas
Hasnain Haider Abbas is a 25 years old web entrepreneur and founder of Articlesteller.com. In the early stage of his life, he fell in love with technology, His expertise is in SEO, Content writing, Social Media, Affiliate Marketing, Web development, and Business promotion.
Thanks for providing such useful information. The given information is really very helpful to me. Hope, I will get more information regarding the same in future.
Dear son, i simply do not know how to thank you much. I am a retired woman who wish to start blogging to make use of my sedentary life. For days I have been searching to create my custom template with my own ideas. But everywhere hightech sentences were my hurdles. Yet i believed that one day i will get what i am looking for. And here i found your site. God bless you child. Regds.
Thank you, for your precious comment
pretty neat tutorial
i made a template i tested it on pagespeed which shows a score of 92 for both mobile and desktop would it be possible if you could have a look at it and let know if its SEO friendly or not..
yup sure, please give me the url
Wow simple but i understand.
thanks for your article
HI there,
I just followed your tutorial but I can’t figure out that how to make a read more button?
Finally, i found tutorial to create a blogger template for scratch. Thanks so much bro…
awesome article, all things illustrated well
Oh Thank you soo soo much brother……….
Bro will you let me no how can add Menu in this template??
it is easy just create a menu and paste it anywhere you want it to appear.. usually, menus appear before
tags
Hi, this is a really nice tutorial. I’m going to use it to design this blog for my friend at http://OrganicHealthyCuisine.blogspot.com. As I write it is using your basic code and I will try to customize it today to make it how we want. It’s great to have a nice clean simple starting point to work with as I was put off with the templates I downloaded that were bloated with so much unnecessary code. now I can design it just how I like and keep it simple and fast. thanks!
thanks for your feedback Lassie
Thanks, I’ll try to developing this simple template.
great to hear that
Hi brother I read your article It is amazing and I actually started working on it and here is the link of my template it seems to be awkward but I just tried it with Twitter Bootstrap. http://tempedio.blogspot.com/
Wow, great work Sarfaraz
Thanks for sharing.
How do we create a template 2 sidebar? like this:
http://azrov.blogspot.com/
Hello Rohim, well that is easy. Just put the sidebar code just before the
tag. Now use CSS to style them. That’s it! 🙂
Hi.
I just copied and pasted everything and I don’t have a Read More button, it shows the posts in full… What could be the problem?
you need to add the read more button yourself :)… Just go to edit post and press this button where ever you want your read more button to appear 🙂 https://goo.gl/j568nV
Oh, cool, thanks!
But I noticed if I don’t put a image before the jump break, the post won’t have a thumbnail in the post list… Is there any workaround for that? I read about putting a hidden image before the jump break that won’t be visible in the post, but in the post list it will, but I rather not have another image load in the background and make the post even heavier to load…
Actually this is really something that is worrying for me too. In wordpress we have an option for featured image so that the post has that image but it does not appear on the post page…. I hope Blogger will add such a function too
Hai thanks so much for this tutorial, its rely useful.
I wan add menu navigation and sub menu navigation, but i wan it still in than use bootstrap to make style with bootstrap, how do i inset coding bootstrap on widget?
for bootstrap, just add the bootstrap classes into the menu…..
why some template use css reset?
Was searching for this article from half an hour,finally got it
nice.. thank you
How do i Add to it. Please help
great articla and thanks for it
Okay I will throw away all PHP stuff with wordpress and jump back to blogger..and its funny, I make wordpress theme but never make blogger theme. Thank’s anyway for your info.
Great post bro.
Where are you now a days?
Hello Prabhat, I am just here 🙂
Amazing method. It is much better than Artisteer software to design blogger template. Please update some CSS styling to make more stylish.
Impressive tutorial, this is exactly what I was looking for.
nice tutorial
thanks alot
Excellent Blog! I would like to thank for the efforts you have made in writing this post. Keep up the great work! You know, lots of people are searching around for this info, you could aid them greatly.
Nice info..
Thanks very much
Incredible work and it is able to apriciate. In web developement Marketing92 is working with latest technology to promote Web Development in Pakistan. We are creating a veriety of Web Development in Lahore.
Beautiful write up.
I already have a blog, please how can I customise it?
Good way of telling, good post to take facts regarding my presentation subject matter, which i am going to deliver in my college
Fully detailed and nicely explained , as a web developer i now can develop some awesome blogger templates . All because of this article, thanks Husnain for this in depth article.
thanks very much for this to you.you give me my needs.I invited to others to join this.
You are awesome bro… I just created nice responsive template using HTML, CSS And boostrab.. I will some release it. Out when I finally it best state… God bless you for your hard woke..
Since last 30 days, I constantly following this blog tutorial “How to Build own Blogger template”, I build up basic template for my blog.
Hi there – what about just a SINGLE PAGE design/template? I want to do a product page layout.
thanks,
Thanks from bottom of my heart!
Really, I was looking for this for a lot of time…
I appreciate your work. I am ready to pay you for beer. Please do a favour. Can you please tell me what is the code behind ‘/search’ in blogger sidebar search widget which looks like (action=’/search’ method= Get). I want to know the server side code for this link which interprets the user query and throws the relevant blog lists containing the search term in new reloaded page. Thanks. I am waiting for your reply. Your Friend from Infia. Email- ceoapkakart@gmail.com
Thank you very much and will look for more postings from you.
Searched all YouTube for this but couldn’t find a comprehensive TUTORIAL.
Thank you so much for this.
I will always reward you someday for this. ❤️❤️❤️❤️